Simply Beautiful Crochet Two-Tone Blonde Braids from Scratch

Sassy Two-Tone Blonde Crochet Braids

Cute Blonde Bun HairstyleHere I go again with yet another one of my creative braid hairstyles, the two-tone crochet blonde braids. I wanted to try the crochet method to do the blonde so that my real hair doesn’t show. Wearing braids have definitely helped my hair grow. I could see more than a inch of new growth by the time I took out my last set of braids. This is how I do my blonde braids from scratch without using pre-braided hair.

If you want to get blonde braids without your hair showing, especially if your hair is black, doing the crochet method is the way to go.

Things I Used

  • A latch hook crochet needle
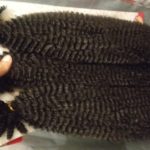
  • Hair (I used pre-stretched Yaky hair 3 1/2 packs, with 4 bundles in each pack)

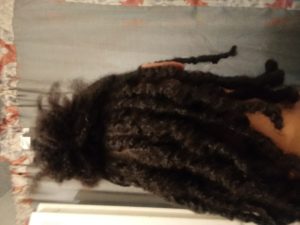
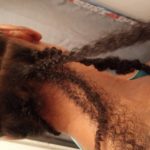
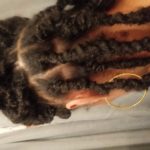
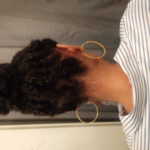
I started by flat braiding my real hair starting from the back left, going across and back to the left until I reached the middle of my head. I flat braided from the front going back towards the middle of my head.

You can leave a little hair so that you can do traditional single braids for a more natural look, that is if you have similar color hair as the braiding hair.

crochet needle for hair
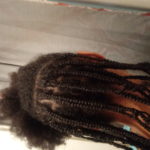
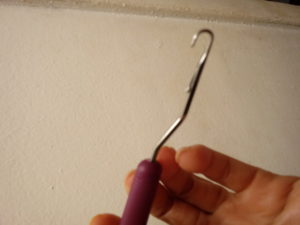
I then use the latch hook crochet needle to loop the ends into the flat braids to secure them. Next, open the latch of the needle, push it through the section of the flat braids that you want to crochet the braids.

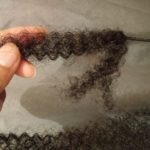
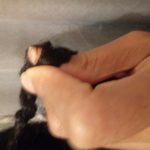
Put about 1/4 inch of the separated loose blonde braiding hair on the hook of the crochet needle and then close the hook before pulling to through the flat braids. You can now start to braid from the roots down to the ends.

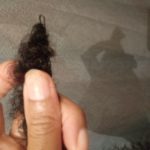
I separated my blonde braids (notice that I used two different colors to give it a more unique two-tone look) into the desired sections I wanted to use.

After Pulling Through the Hair with the Latch Hook Crochet Needle

how to install crochet braids
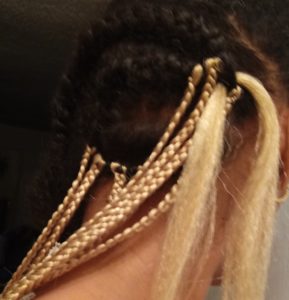
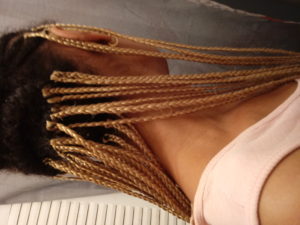
I start to crotchet the separated braiding hair into the flat braids at the back, then braided the blonde hair all the way to the ends. I do each single braid right across. Then I continue the same pattern until I complete the back. Leave a little space between each crochet braid.

For the front, I crochet the pieces of separated blonde hair into each section of the flat braided hair then continued row by row. I completed braiding my blonde braids and trimmed the ends.

To keep the ends nice and sleek with a hint of curls, I dip them in steaming hot water. Please do this with caution to avoid burning yourself with the hot water. This took me some to time to complete since I wasn’t focusing on just braiding. Let’s just say that it took me some days to finish it, and I ran out of hair so I had to go to the hair store go get me some more.

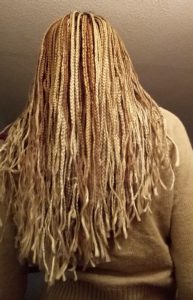
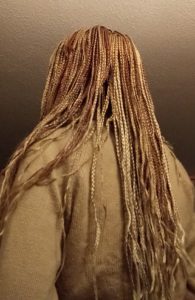
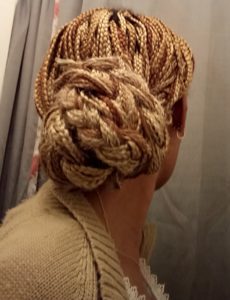
Here is the finished look. I love the feel of the Yaky pre-stretched hair. It is so lightweight and silky until you forget that you are actually wearing braids. Be bold and step out in style, making many heads turn with this two-tone crochet braids.

Two Tone Blonde Crochet Braids


Protective Style: Simple Beginner’s Tutorial for Distressed Butterfly Locs-Spring Twist

Butterfly Locs in the Process

The butterfly/distressed locs is a popular trending hairstyle. When you have natural hair, it can be difficult to find stylish hairdos. The good thing about this butterfly locs hairstyle, is that it does not only looks natural but also is a great way to protect your natural hair. You too can wear this trendy hairstyle without breaking the bank. Follow along with my simple detailed butterfly locs tutorial.

You can do your distressed butterfly locs on short or long hair. Even if you have long hair and just want to create a cute bob distressed locs style, you can pull that off by doing a little trick. Yes, that’s right. You don’t need to cut your hair to wear a shorter version of the butterfly locs hairdo.

Hair Preparation

Before I do any type of hairstyle, I always make sure that my hair is thoroughly cleansed. So, I start by washing, conditioning, and moisturizing my hair prior to doing my braids. You don’t want to braid dry, brittle hair, as this will cause hair damage or hair breakage.

Prepping Your Spring Twists

For  the spring twists, you want to prep them, which simple means that you are separating the strands and fluffing them out so they look more natural and kinky. If you want fatter distressed locs, you just simply have to use more strands of the spring twists to get that fuller look.

What You’ll Need

  • Crochet needle for hair
  • Rat tail comb or wide tooth comb
  • Scrunchies or any hair holders
  • Aloe Vera gel (Used when doing the single braids)
  1. Part your hair in the desired size. Leave the roots a bit loose so that the crochet needle can easily go through it. I do box parts but you can do freestyle parts or any other style parts you want.

    Single Braids Before Crocheting Butterfly Locs
    Single Braids Before Crocheting Butterfly Locs
  2. Plait or single braid each parted section until your whole head is completely braided.
  3. Use a clip, hair elastic or any hair holder to keep the rest of the single braids out of the way.
  4. Take out two strand or more of the spring twists (depending on how fat you want your butterfly locs).
  5. Push the crochet needle through the single braid roots, then attach the spring twist onto it, then pull it through. (I found that putting about 1 1/2 of the spring twist in a hair pin and pulling it through my braided roots worked better and faster for me. Use the closed end/bottom of the hair pin to insert it through the roots).

    distressed locs spring twists
    Using Closed End of Hairpin to Crochet Spring Twist
  6. Make one of the strand of hair longer than the other, so that you can secure the ends with the excess longer piece when you get to the end. (No need for elastic or nail glue). You can palm roll the ends to give them a neater look.
  7. Grab both strands of the spring twists and firmly wrap them around your roots about 3 to 4 times. Use your left hand, thumb, and pointer finger to hold the hair while wrapping. If you use right hand, use your right hand to do the wrapping.
  8. Continue to wrap the hair around your single braid while using the thumb method (wrapping little sections over your thumb to make it look a bit puffy) to make the butterfly look. If you want a more distressed look, use the thumb to spread out the hair or pinch some strand of hair as you wrap.
  9. Separate the extended piece of hair at the end in two. Use one section to wrap upwards, then the other piece to securely wrap that as well. (Spring twists are kinky so they will not unravel at the ends.)
  10. Continue to use the above methods to wrap your hair and creating soft, beautiful butterfly locs to suit you. Notice that mine does not look like distressed locs that much, but more like butterfly locs.

Butterfly Locs on Long Hair

If you have long hair and want to achieve the bob butterfly locs look, you can simply fold your hair to the desired length as you wrap, then reverse the wrap of the spring twist so that it wrap upwards. My natural hair in some areas were longer than the twists, so all I did was fold them at the end so that they looked even.

Natural Looking Butterfly Locs

I love this spring twist hair. It is so versatile and natural-looking. People who know me thought that this was my real hair. The only thing that made a difference was how fuller my hair looked. Another thing I noticed was how light it felt. It also moves and actually feels bouncy.

Be creative with your butterfly/distressed locs. You can change up your hairstyle whenever you want to match any occasion. This hair is already kinky, so it can withstand different styles. Even if you just did the butterfly look, as your hairstyle gets older, it will start to look like distressed locs.

How to Take Care of Your Butterfly Locs

There’s not much that you need to do with this hairstyle. If you listen to the hair, it says it all, distressed locs. I simply use a sleep cap to cover my butterfly locs before going to bed. Also, don’t forget to oil your scalp to prevent flaking and dryness.


Dry Hair Solution: Is Aloe Vera Really as Good as They Say?

Succulent Organic Slice of Aloe Vera

Aloe Vera has been the go-to for many people who have dry, thirsty hair. It is thought to be one of the best natural remedies for those who are looking to add moisture and life to their hair. The big question is; is Aloe Vera really a good natural remedy for dry hair? If you’re looking for the answer to this question, I have my own testimony to share about using Aloe Vera juice in my natural hair.

My Aloe Vera Testimony

This is my story about using Aloe Vera. I grew my dreadlocks for six years. Throughout those six years, I have done extensive research on the use of Aloe Vera. Growing up, I always saw my mom use Aloe Vera and she even used to give us a little of the juice to drink. All I know is that it was really bitter.

Fast forward to now, I went back to my roots and decided to do some digging of my own to find out more about this mystical plant, the Aloe Vera. I started using the gel from the plant in my dreadlocks, and I instantly fell in love with it. I also used it on my skin and enjoyed how soft my skin looked and felt.

When I use my homemade Aloe Vera Juice in my hair, it feels softer, looked shinier, and retained moisture for days. Aloe Vera is packed with many different vitamins and minerals that is essential for beautiful hair.

If you decide to use Aloe Vera Juice in your natural hair, you can either purchase the pre-bottled ones or you can make your own homemade Aloe Juice. The great thing about Aloe, is that it can be used as a natural remedy for a variety of conditions such as: dry, itchy scalp and dandruff. It can also be used to promote hair growth and as a natural moisturizer for both hair and skin, etc.

My Thoughts About the Aloe Vera Plant

The Aloe Vera is a very succulent plant. This plant usually thrives better in dry climate. Did you notice I said dry? Yes, I think that’s why it is such a great natural remedy from mother nature to combat dryness, whether it’s dry hair or dry skin. It is even great for treating sunburns. It simply just moisturizes and heal with its natural ingredients.

Using Aloe Vera As a Natural Aftershave Remedy

Guys, don’t feel left out. You can also use Aloe Vera as a natural aftershave and to prevent or treat razor bumps. Using Aloe Vera after shaving can help to soothe irritated skin and prevents inflammation and redness, leaving your skin smooth to the touch. Always keep in mind that not everyone’s skin can tolerate Aloe Vera juice. Only use the clear gel from the plant.

Tip of the Day

  • Try a small area of your inner arm to check for allergic reaction before using Aloe Vera on your face.
  • Do not use the yellow liquid from Aloe Vera, which is latex, as this can cause allergic reaction.