The butterfly/distressed locs is a popular trending hairstyle. When you have natural hair, it can be difficult to find stylish hairdos. The good thing about this butterfly locs hairstyle, is that it does not only looks natural but also is a great way to protect your natural hair. You too can wear this trendy hairstyle without breaking the bank. Follow along with my simple detailed butterfly locs tutorial.
You can do your distressed butterfly locs on short or long hair. Even if you have long hair and just want to create a cute bob distressed locs style, you can pull that off by doing a little trick. Yes, that’s right. You don’t need to cut your hair to wear a shorter version of the butterfly locs hairdo.
Hair Preparation
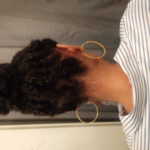
Before I do any type of hairstyle, I always make sure that my hair is thoroughly cleansed. So, I start by washing, conditioning, and moisturizing my hair prior to doing my braids. You don’t want to braid dry, brittle hair, as this will cause hair damage or hair breakage.
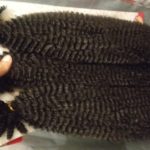
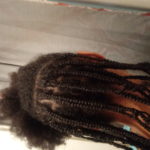
Prepping Your Spring Twists
For the spring twists, you want to prep them, which simple means that you are separating the strands and fluffing them out so they look more natural and kinky. If you want fatter distressed locs, you just simply have to use more strands of the spring twists to get that fuller look.
What You’ll Need
- Crochet needle for hair
- Rat tail comb or wide tooth comb
- Scrunchies or any hair holders
- Aloe Vera gel (Used when doing the single braids)
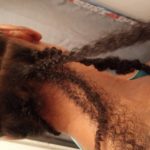
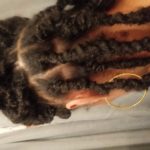
- Part your hair in the desired size. Leave the roots a bit loose so that the crochet needle can easily go through it. I do box parts but you can do freestyle parts or any other style parts you want.
Single Braids Before Crocheting Butterfly Locs - Plait or single braid each parted section until your whole head is completely braided.
- Use a clip, hair elastic or any hair holder to keep the rest of the single braids out of the way.
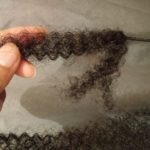
- Take out two strand or more of the spring twists (depending on how fat you want your butterfly locs).
- Push the crochet needle through the single braid roots, then attach the spring twist onto it, then pull it through. (I found that putting about 1 1/2 of the spring twist in a hair pin and pulling it through my braided roots worked better and faster for me. Use the closed end/bottom of the hair pin to insert it through the roots).
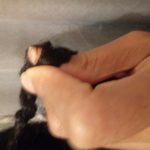
Using Closed End of Hairpin to Crochet Spring Twist - Make one of the strand of hair longer than the other, so that you can secure the ends with the excess longer piece when you get to the end. (No need for elastic or nail glue). You can palm roll the ends to give them a neater look.
- Grab both strands of the spring twists and firmly wrap them around your roots about 3 to 4 times. Use your left hand, thumb, and pointer finger to hold the hair while wrapping. If you use right hand, use your right hand to do the wrapping.
- Continue to wrap the hair around your single braid while using the thumb method (wrapping little sections over your thumb to make it look a bit puffy) to make the butterfly look. If you want a more distressed look, use the thumb to spread out the hair or pinch some strand of hair as you wrap.
- Separate the extended piece of hair at the end in two. Use one section to wrap upwards, then the other piece to securely wrap that as well. (Spring twists are kinky so they will not unravel at the ends.)
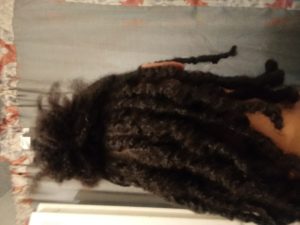
- Continue to use the above methods to wrap your hair and creating soft, beautiful butterfly locs to suit you. Notice that mine does not look like distressed locs that much, but more like butterfly locs.
Butterfly Locs on Long Hair
If you have long hair and want to achieve the bob butterfly locs look, you can simply fold your hair to the desired length as you wrap, then reverse the wrap of the spring twist so that it wrap upwards. My natural hair in some areas were longer than the twists, so all I did was fold them at the end so that they looked even.
Natural Looking Butterfly Locs
I love this spring twist hair. It is so versatile and natural-looking. People who know me thought that this was my real hair. The only thing that made a difference was how fuller my hair looked. Another thing I noticed was how light it felt. It also moves and actually feels bouncy.
Be creative with your butterfly/distressed locs. You can change up your hairstyle whenever you want to match any occasion. This hair is already kinky, so it can withstand different styles. Even if you just did the butterfly look, as your hairstyle gets older, it will start to look like distressed locs.
How to Take Care of Your Butterfly Locs
There’s not much that you need to do with this hairstyle. If you listen to the hair, it says it all, distressed locs. I simply use a sleep cap to cover my butterfly locs before going to bed. Also, don’t forget to oil your scalp to prevent flaking and dryness.