Scrumptious Gluten-Free Coconut Macaroon with a Sprinkle of Pecans

crispy outside coconut macaroon treat
Yummy Coconut Macaroon with
Pecans

If you are looking for something different to add to your Thanksgiving or Christmas festivities, coconut macaroons is the way to go. There are different twists that you can take with these delicious coconut treats, but it all boils down to your preference. Some people add nuts or condensed milk, while others just make the old time coconut macaroons, which is just as pleasing to the palate.

What You’ll Need:

  • 2 Cups freshly grated (unsweetened) coconut or shredded coconut
  • 1 Cup granulated sugar (Less if using pre-sweetened coconut)
  • 2 egg whites (room temperature)
  • 1 Tablespoon vanilla extract
  • 1 Teaspoon lemon extract
  • A pinch of salt
  • 1/4 cup of finely chopped pecans

Directions for Coconut Macaroon:

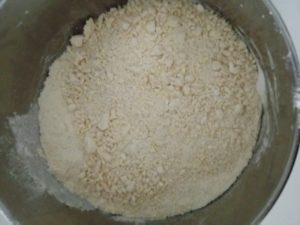
Mix or whisk the egg white until fluffy, then add the granulated sugar and continue mixing until stiff peaks form (the mixture can stand straight after mixing, almost like whipped cream).

Add the vanilla extract, lemon extract, and salt to the mixture.

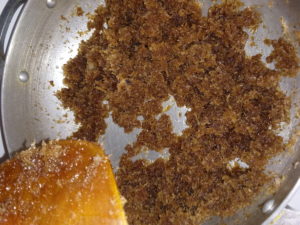
Add the coconut and chopped pecans, then combine all the ingredients using the folding method.

(For a creamy texture, add 3 tablespoon condensed milk to the mixture).

The folding method in baking is done by using a wooden spoon or a spatula to bring the bottom of the mixture across the side then over the top. Continue using this method until all the ingredients are combined.

Set the mixture aside for at least 10-15 minutes so that all the ingredients can soak in properly.

Thanksgiving gluten free sweet dessert
Pre-baked Plain and Pecan Coconut Macaroon

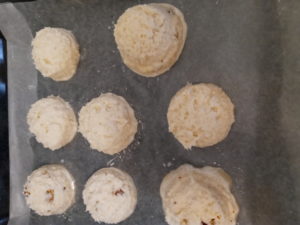
Use a cookie scoop or an ice-cream scoop to place them on a non-stick baking tray. You can also place a piece of parchment paper or waxed paper on a non-stick tray instead.

Put the tray in a pre-heated oven and bake for about 15-20 minutes.

Remove when baked and allow to cool thoroughly before taking them off the tray.

They will break up if they are shifted when still hot.

These delicious coconut sweet treats won’t last long, so make sure to bake enough for everyone!

Extra Moist Homemade Pineapple Cake Made From Scratch

making moist pineapple cake
Extra Moist Juicy Pineapple Cake

Pineapple cake is another one of my all-time favorite desserts. You know, although you can quickly buy a ready-made cake, nothing beats making your own homemade pineapple cake from scratch. The good thing about this is that you get to personalize it and involve the family, especially the little kids. Here is a quick and simple recipe to make an extra moist pineapple cake at home.

Recipe for Extra Moist Pineapple Cake

INGREDIENTS

  • 1 Cup granulated sugar
  • 3 Tablespoons brown sugar
  • 1/2 Cup margarine
  • 3 large eggs
  • 2 Cups all-purpose flour (sifted)
  • 3 Teaspoons baking powder
  • 1/4 tsp salt
  • 2 Tablespoons vanilla
  • 1 Tablespoon lemon or lime juice
  • 1 Cup pineapple juice
  • 1/2 cup chopped pineapple (I use fresh pineapple but you can use the can ones).

DIRECTIONS

Take out the margarine and eggs from the refrigerator and let them get to room temperature before using them.

Preheat your oven to 350 degrees.

Use a mixer to mix the butter and sugar together until creamy.

Break the eggs one at a time in a separate container to ensure that non of them is spoiled. (You don’t want to have one rotten egg spoiling the rest of the good ones.)

Remove the egg eyes to prevent the raw/egg taste in your cake. My mom taught me that trick when I used to watch her as a kid while she was baking. (See photos below)

Mix the 3 eggs until they become fluffy.

Pour the eggs into the creamed butter and sugar then mix.

Add the the vanilla, lime/lemon juice to the mixture and continue to mix.

Sift the dry ingredients in another bowl (flour, salt, baking powder).

Add the dried ingredients (flour, salt, baking powder) to the wet ingredients a little at a time while using a wooden spoon to mix out any lumps of the flour. Use the cut and fold method while mixing to get your cake light and fluffy and to remove air bubbles.

Pour some of the pineapple juice as you mix to keep your batter smooth.

Continue adding the dried ingredients while adding the rest of the pineapple juice as you mix with the spoon, making sure to scrape down the sides of the bowls as you go along.

Add the chopped fresh pineapples to your batter and mix with the wooden spoon.

Pour your cake batter in a greased cake pan.

Bake for 45-55 minutes or until baked. Test with a toothpick or a bamboo skewer. The cake is baked when the toothpick comes out dry.

Tip of the Day for Extra Moisture

Place a pan with water on the bottom rack of the oven to create steam. This will make your pineapple cake even juicer and moist.

Easy to Make Coconut Gizzada, a Delicious Homemade Treat

Sweet Coconut Gizzada Pastry

Here we go again with another easy to make sweet coconut treat. This time I’ll be sharing how to make this simple, yet scrumptious dessert that can be enjoyed on any occasion.

Speaking of occasion, now that the holidays are approaching fast, the coconut gizzada is a great addition to your traditional holiday dishes. With just a few ingredients and some easy to follow steps, you too can master the art of making your own coconut gizzada dessert.

Yummy Old Time Jamaican Gizzada treat
Flaky Gizzada Crust/Juicy Filling

The coconut gizzada consists of the outer shell/crust and coconut filling. Although this is a simple recipe, there are a few tips and tricks I use to make my coconut gizzada a bit more unique.

What you’ll need for the filling:

  • 2 cups grated or flaked coconut
  • 1 cup brown sugar (less sugar if you’re diabetic)
  • A pinch of salt
  • Vanilla
  • Grated nutmeg
  • Cinnamon powder
  • Grated ginger (optional)

What you’ll need for the crust:

  • 2 cups all-purpose flour
  • 1 stick butter (equals to 1/2 cup)
  • 1 egg yolk (optional)
  • A pinch of salt
  • Cinnamon (optional)
  • Ice water

Mix all the ingredients for the filling into a bowl, cover it, and leave it for at least 30 minutes. This way the spices will soak thoroughly into the grated coconut.

making coconut filling dry
Coconut Filling Ready for Gizzada Crust

After soaking, add 1 1/2 cup of water, stir and let it boil down completely. Make sure that all the liquid is gone with just enough to keep the filling together.

butter dough mixture
Dry Mixture for Coconut Gizzada Crust

Now for the dough. Make sure that your butter is cold, straight from the fridge. Cut small slices of butter and add it to the flour. Use your fingertips and work the butter into the flour. Add the egg yolk and stir it into the flour. The egg yolk and butter will make a more crunchy, flaky gizzada crust rather than a chewy crust.

Use ice water to make your dough and make sure not to knead the dough. You just need to get all the mixture combined together into a ball. Then wrap it securely with a piece of plastic wrap and place it in the fridge for at least 30 minutes.

Once the dough is taken from the refrigerator, lightly flour the surface that you will be using. Cut the dough in pieces that would estimate the size of each shell. Use a rolling pin to roll out the dough into a circle. You may use a circular shaped kitchenware to get a perfect circle or a pastry cutter.

Making gizzada shell from scratch
Homemade Gizzada Crust

Take the circular dough and pinch the corners. The best way to do this is to put your index finger on the inner location that you’re about to pinch then use your other thumb and index finger to pinch that area. Leave about 1/2 between each pinch and continue that pattern until your shell look similar to the ones in the photo below.

I like to pre-bake my gizzada crust for about 5-10 minutes to help them hold their shape. Grease the baking tray to prevent your gizzada crust from sticking to it.

dough for coconut gizzada
Prebaked Gizzada Crust

After pre-baking the gizzada shells, use a spoon to put the coconut filling into each shell. Place them back in the oven and bake for another 10 or so minutes.

Tip of the day:

A quick gizzada tip is to use a fork to stick the shells so the inside of the shells  stay flat while baking.