Hydrating Coconut Water: Trick to Getting Water Out of a Dry Coconut

get water from dry coconutRemoving the water from a dried coconut might seem tricky for some people, so I’m going to tell you a trick that I use to remove the water without spilling any of this delicious hydrating drink.

Before I learned about this little secret, I always lost a lot of my coconut water. I’m so glad I found out the easy way to remove the water, so much that I have to share this simple tip with all of you.

I love to wash my coconut off first, since so many people tend to pick up the coconut, shake it, or test if it’s good. After washing the coconut thoroughly, I use a piece of napkin to dry the shell off.

remove water from coconut shell
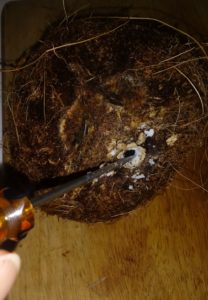
Next, you’re going to get a slim screwdriver, one that is clean and free of rust. This will be used to bore a hole in the soft eye of the coconut. The coconut three eyes are located at the top of the shell. One of these eyes is soft enough to pierce with a sharp object so that you can get every drip of the coconut water out without wasting any.

After piercing a hole in the shell of the coconut, I place a strainer over a container and drain out the water. The strainer helps to catch any broken parts of the shell or other debris, so you can drink your natural, delicious, healthy coconut water undisturbed.

Lime With Coconut Water

lime with coconut water
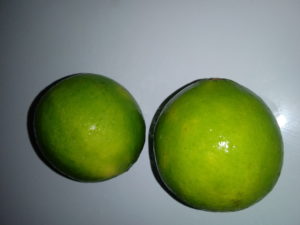
Give your coconut water an extra zest by squeezing some lemon or lime juice in it. This is so refreshing and nice, especially in hot climates, not to mention if it’s ice cold. This is the perfect natural drink to beat the heat.

It also seems to give me some extra energy as well when I drink my coconut water with lime juice. Lime to me has a more sour and tangy taste than lemon, so I like that extra kick to my coconut water. Now that you’ve learned how to get water out of a coconut, go get your own coconut and enjoy this refreshing drink.


Root Overgrowth: The Real Reason Your Boston Fern Might Be Dying

Overgrown Boston Fern

Oh, how I loved seeing my beautiful lush, green Boston Fern until I noticed that the fronds were falling off in large amounts. In addition to the leaves falling off, the plant on a whole looked lifeless.  The plant was really thick, so I figured that it had outgrown its pot.  Unfortunately, Boston Fern root overgrowth is common if you have a fast growing plant. In some cases, root overgrowth could be the real reason why your Boston fern is dying.

Although Boston Fern needs adequate water, light, and humidity, not providing those are not the only reasons that can cause their leaves to fall off. Unfortunately, I experienced seeing my Boston Fern starting to die right in front of my eyes. I had an idea that it was growing out of its pot and decided to remove it and look at the roots.

Upon removing it from the plant pot, I noticed that the roots were wrapped all around the soil, so much that you could barely see the soil itself. I decided to divide the soil in half and transplanted it into two different pots. The roots were so overgrown until it was slowly suffocating the fern.

One good thing about the root overgrowth was that at least I knew it was thriving so well until it grew out of its pot; however, the pot that it was in was just too small for it to expand and thrive. So, repotting was the best solution to try and save my beautiful fern.

After dividing the plant, I added new soil in each new pot and planted them separately. So far one of the plant is doing well, except for when I forget to water it, while the other one didn’t make it. Compared to all of my other house plants, the Boston Fern seem to be a bit more fussier. It constantly needs to be watered, misted, and have a favorable humid environment.

When repotting Boston Fern, make sure that you choose a nice size pot that will accommodate the growing root system. Continue to water and mist your fern to keep the fronds and plant healthy and green. You will need to develop your own way of figuring out when your plant need water. I feel the soil and if feels dry, or if the pot is light, I water it.

The soil may dry out more often depending on if the weather is hot. Sometimes you may have to water daily, or two to three times a week, to keep your Boston Fern looking lush and green. It all depends on the temperature in your home.

Yes, Boston Fern may be a bit fussier than other houseplants, but identifying a few key factors can help to determine what works best for your fern baby. In the end, it will worth all your efforts.


Boosting Humidity: Increasing Indoor Plants Humidity Level Effectively

humidity in house plants
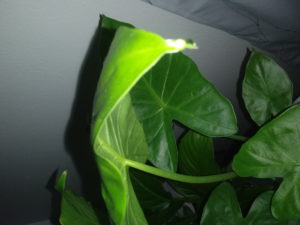
If you have indoor plants, you may notice that some of them do well while others tend to not do so good. That is because some houseplants need high humidity, which is recommended to be between 50 to 60 %, with tropical indoor plants needing even up to 80% humidity.

If the humidity level in your home don’t fall in that percentile, your houseplants will go through stress. If your home’s humidity level is not the best, no worries, there are ways to create the ideal humidity around your beloved house plants.

I learned the hard way with my house plants when it came to not having the ideal humidity level. After doing some research and adjusting a few things, I noticed a huge difference in the health of my plants. Here are some things that I do to increase the humidity level around my house plants.

Signs of Low Humidity in House Plants

If you see the tips of your plant leaves starting to look brown or they are becoming yellow, this may mean that you need to increase the humidity level in the air around them. You may also notice that the leaves feel crispy to the touch. Keep in mind that some of these signs may be due to other issues such as underwatering.

Pebble Trays for  High Humidity Plants

To satisfy your high humidity houseplants needs, you can use a pebble tray. You can make them yourself by placing small rocks in a tray then add water a little below the rocks. The idea is to avoid having your houseplant sitting in water but to enjoy the humidity that will release in the air. Just make sure that the pot with your plant is sitting above the water on the pebbles or rocks. If you don’t have pebbles or rocks, you can use toy marbles in your tray as well. They are colorful and sturdy enough to withstand water.

Misting Your Indoor Plants

Misting is another great way to keep your house plants in a humid environment. When you are purchasing a misting bottle, make sure that it has the option to produce fine mists because as you know, not all plant misting bottles are equal. My Boston Fern is a prime example of some plants that may benefit from frequent misting. I like to mist the leaves at least two times a day to keep them looking lush, green, and beautiful.

Grouping House Plants to Promote Humidity

Grouping Indoor Plants

Grouping your indoor plants together is not such a bad idea also, if you want them to enjoy the ideal humidity they crave for. You can still place a pebble tray in the midst of them to increase more humidity in the air. When the transpiration process occurs, it will gradually increase the humidity level around your plant babies.